
GPS&罗盘
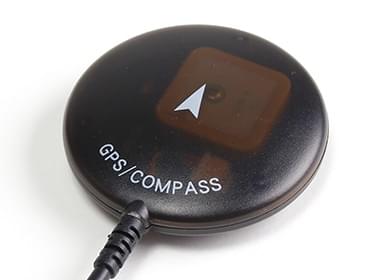
PX4 supports Global Navigation Satellite Systems (GNSS) such as GPS, GLONASS, Galileo, Beidou, QZSS and SBAS, etc. using receivers that communicate via the u-blox, MTK Ashtech or Emlid protocols, or via UAVCAN. A GNSS system is needed for missions, and some other automatic and manual/assisted modes.
Most GNSS modules also contain a compass/magnetometer part (see link for calibration/setup information). Because of this the GNSS module should be mounted as far away from the motor/ESC power supply lines as possible - typically on a pedestal or wing (for fixed-wing).
:::note PX4 also supports Real Time Kinematic (RTK) and Post-Processing Kinematic (PPK) GNSS Receivers, which extend GNSS systems to centimetre-level precision. :::
Supported GNSS
PX4 should work with any unit that communicates via the u-blox, MTK Ashtech or Emlid protocols, or via UAVCAN.
This table contains non-RTK GNSS units (most of which also have a compass). These have been tested by the PX4 dev team, or which are popular within the PX4 community.
| Device | GPS | Compass | Notes |
|---|---|---|---|
| ARK GPS | M9N | ICM42688p | |
| Avionics Anonymous UAVCAN GNSS/Mag | SAM-M8Q | MMC5983MA | |
| CUAV NEO 3 GPS | M9N | IST8310 | |
| CUAV NEO 3 Pro GPS | M9N | RM3100 | |
| CUAV NEO 3X GPS | M9N | RM3100 | |
| CubePilot Here2 GNSS GPS (M8N) | M8N | ICM20948 | |
| Drotek DP0804 | M9N | LIS3MDL | Also see other Drotek u-blox GPS/Compasses |
| Emlid Reach M+ | ✓ | ✗ | Supports PPK. RTK expected. |
| Holybro DroneCAN M8N GPS | M8N | BMM150 | |
| Holybro Micro M8N GPS | M8N | IST8310 | |
| Holybro Nano Ublox M8 5883 GPS | UBX-M8030 | QMC5883 | |
| Holybro M8N GPS | M8N | IST8310 | |
| Holybro M9N GPS | M9N | IST8310 | |
| Holybro DroneCAN M9N GPS | M9N | BMM150 | |
| Hobbyking u-blox Neo-M8N GPS with Compass | M8N | ✓ | |
| LOCOSYS Hawk A1 GNSS receiver | MC-1612-V2b | optional | |
| LOCOSYS Hawk R1 | MC-1612-V2b | ||
| LOCOSYS Hawk R2 | MC-1612-V2b | IST8310 | |
| mRo GPS u-blox Neo-M8N Dual Compass | M8N | LIS3MDL, IST8308 | |
| Sky-Drones SmartAP GPS | M8N | HMC5983, IST8310, LIS3MDL | |
| Zubax GNSS 2 | MAX-M8Q | LIS3MDL |
Notes:
- ✓ or a specific part number indicate that a features is supported, while ✗ or empty show that the feature is not supported. "?" indicates "unknown".
- Where possible and relevant the part name is used (i.e. ✓ in the GPS column indicates that a GPS module is present but the part is not known).
- The list may omit some discontinued hardware that is still supported. The original Here has already been removed. Check earlier versions if a discontinued module is not mentioned here.
Mounting the GNSS/Compass
Mounting the Compass explains how to mount a GNSS module that has a compass (it is the compass part that is affected by electromagnetic radiation).
Hardware Setup
Instructions for connecting the GPS (and compass, if present) are usually provided by the manufacturer (at least for more common Autopilot Hardware).
Pixhawk Series controllers typically have a clearly labeled port for connecting the GPS, and the compass is connected to either the I2C or SPI port/bus (depending on the device).
The ARK GPS, ARK RTK GPS, Zubax GNSS 2, CUAV C-RTK2, CubePilot Here3 CAN GNSS GPS (M8N), and Avionics Anonymous GNSS/Mag can also be connected via DroneCAN.
WARNING
Pay attention to pinout when connecting the GPS module. While these are all software-compatible, there are several different pin orderings.
GNSS Configuration
The "standard" GPS configuration is provided below. Additional device-specific configuration may be provided in PX4 or manufacturer device documentation (e.g. Trimble MB-Two > Configuration).
WARNING
The GPS protocol expected by PX4 defaults to u-blox (by default other GPS types like Trimble, Emlid, MTK, will not be detected) The protocol can be configured with GPS_x_PROTOCOL.
Configuring the Primary GPS
GPS configuration on Pixhawk is handled transparently for the user - simply connect the GPS module to the port labeled GPS and everything should work.
:::note The default Serial Port Configuration works for most devices. If you are using the Trimble MB-Two you will need to modify the configuration to explicitly set the rate to 115200 baud. :::
Configuring a Secondary GPS (Dual GPS System)
To use a secondary GPS, attach it to any free port, and then perform a Serial Port Configuration to assign GPS_2_CONFIG to the selected port.
The following steps show how to configure a secondary GPS on the TELEM 2 port in QGroundControl:
- Find and set the parameter GPS_2_CONFIG to TELEM 2.
- Open QGroundControl and navigate to the Vehicle Setup > Parameters section.
- Select the GPS tab (1), then open the GPS_2_CONFIG parameter (2) and select TELEM 2 from the dropdown list (3).
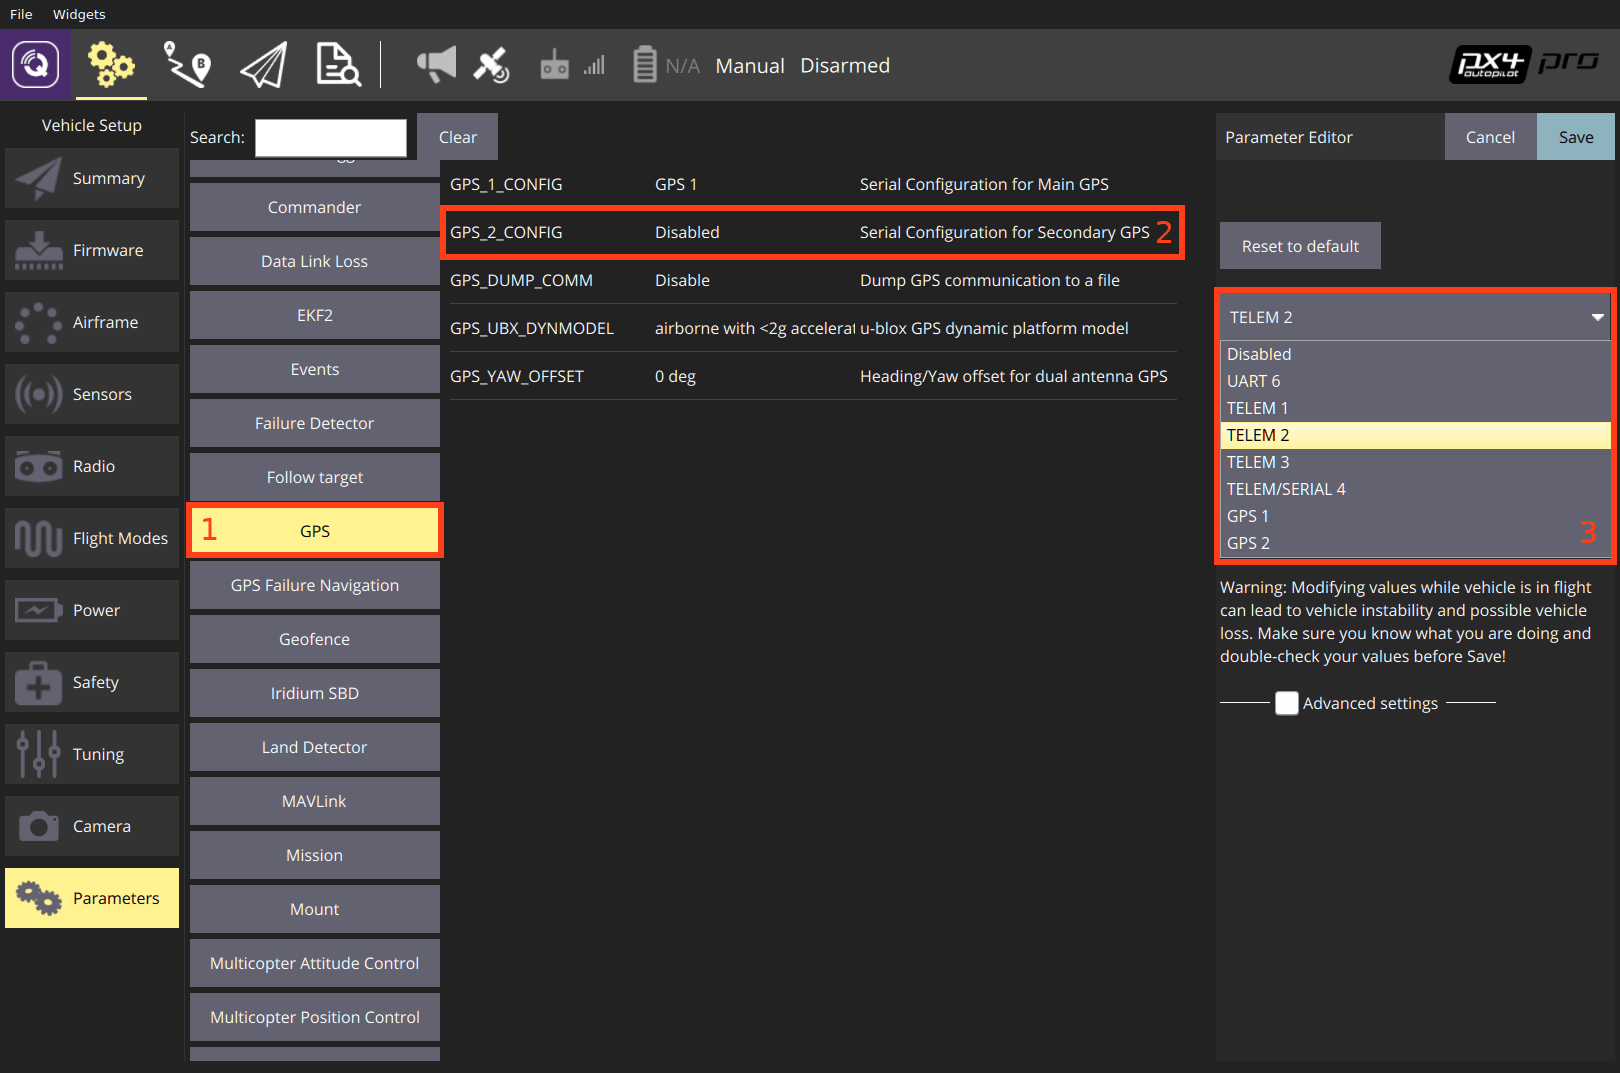
- Reboot the vehicle in order to make the other parameters visible.
- Select the Serial tab, and open the SER_TEL2_BAUD parameter (
TELEM 2port baud rate): set it to Auto.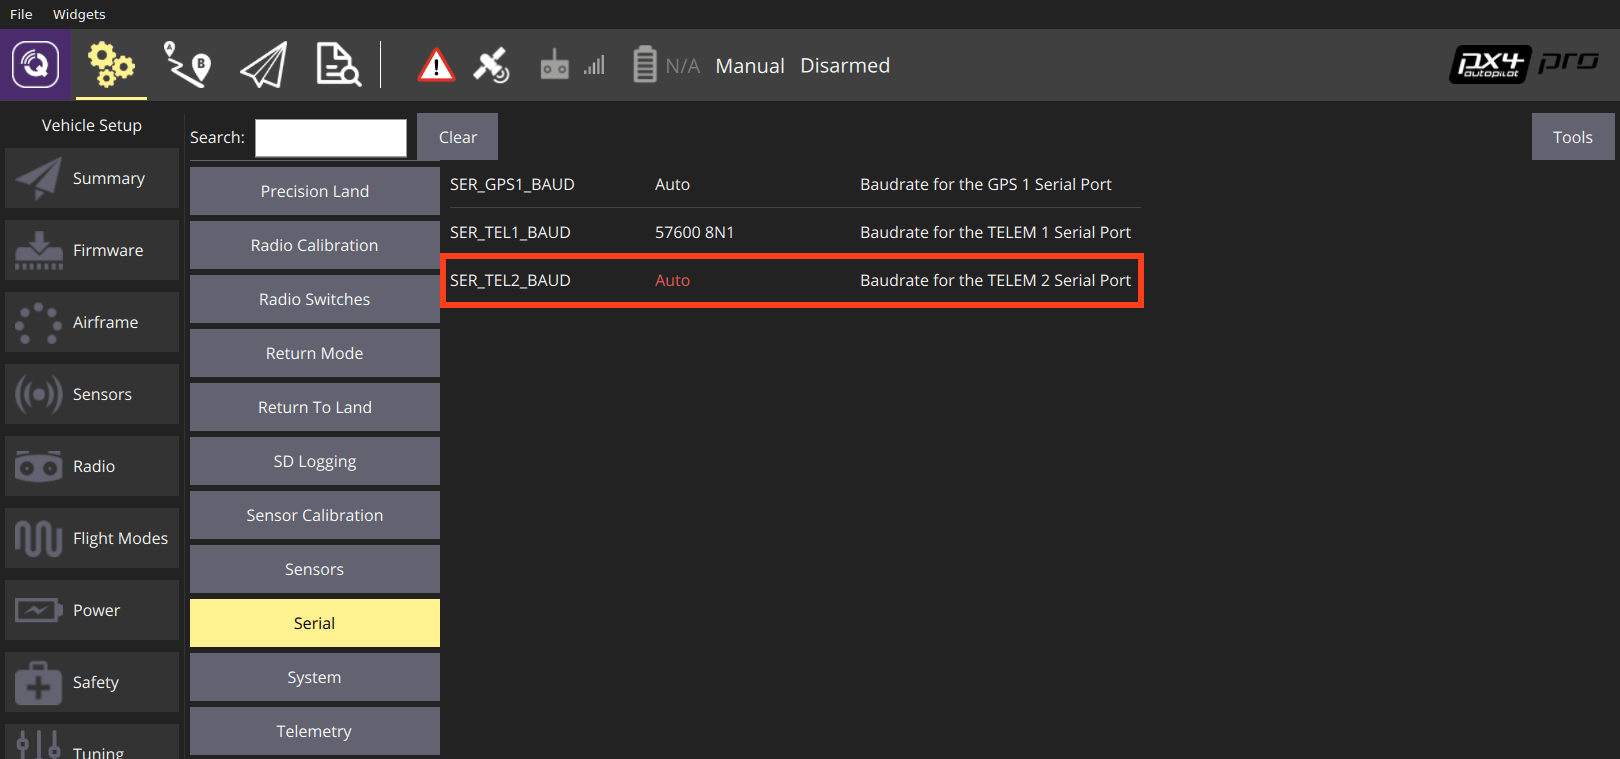
After setting up the second GPS port:
- Configure the ECL/EKF2 estimator to blend data from both GPS systems. For detailed instructions see: Using the ECL EKF > Dual Receivers.
Configuring GPS as Yaw/Heading Source
GPS can be used as a source for yaw fusion when using modules where yaw output is supported by the device. This is documented in RTK GPS > Configuring GPS as Yaw/Heading Source.
Compass Configuration
Compass calibration for an included compass part is covered in: Compass Configuration.
Developer Information
- GPS/RTK-GPS
- Compass
- Driver source code (Compasses)